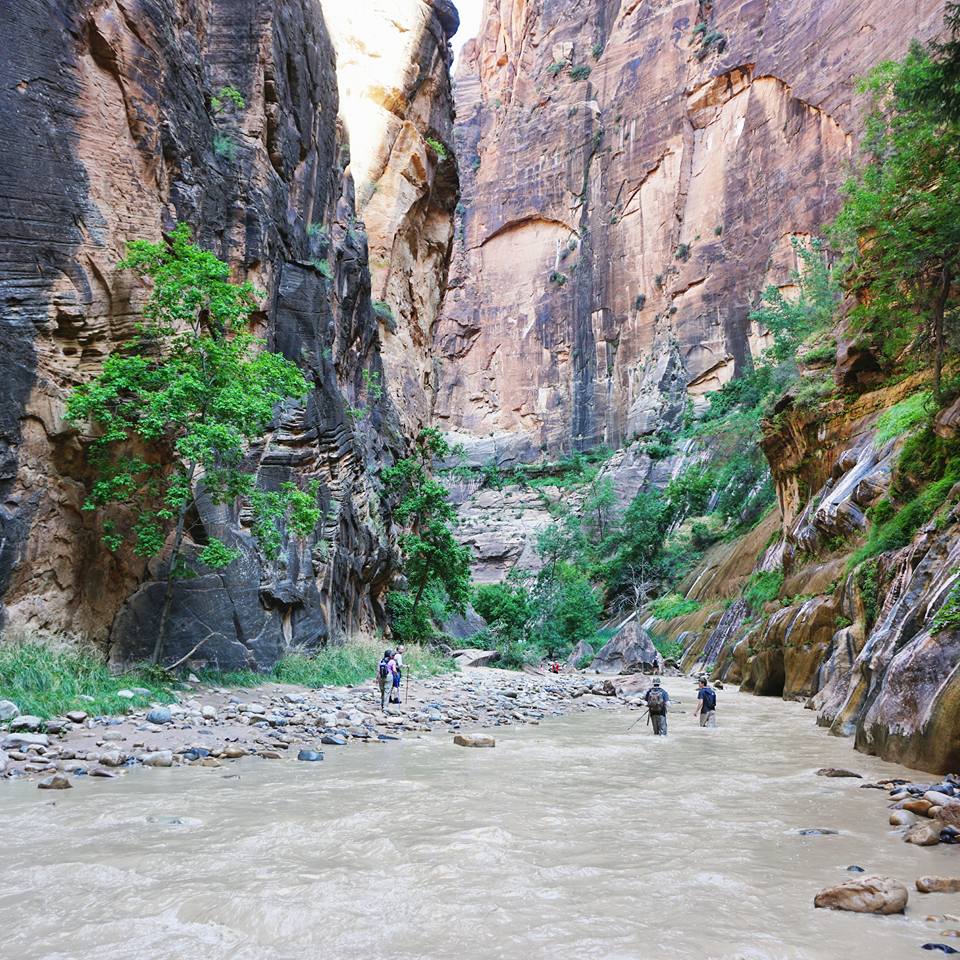
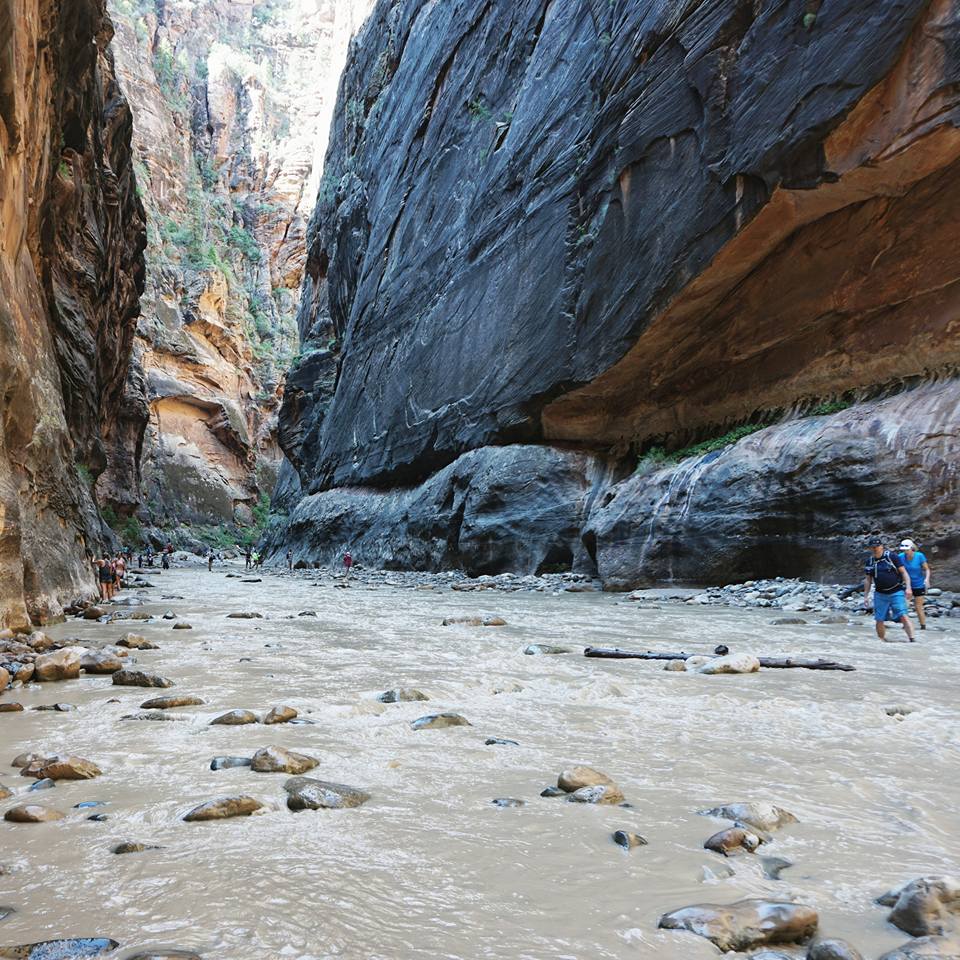
Located in Zion National Park, The Narrows is the narrowest section of Zion Canyon. This popular hike is one of the world’s best slot canyons and can be tailored to suit any ability level.
Just upstream from the Temple of Sinawava is the section of the Virgin River where this awe-inspiring hike starts. With very little direct sunlight and water flowing all around you, The Narrows is a bucket list hike for any adventure seeker.
Last summer was my first trip to Zion National Park when I hiked up Angel’s Landing. I enjoyed my visit to Zion so much that I booked another trip to hike The Narrows this summer. It was an incredible experience to say the least and I highly recommend it to any outdoor enthusiast.
We arrived to the park shortly after 7:00am and took the 40 minute free shuttle ride to the Temple of Sinawava, where the trailhead to the Zion Narrows begins.
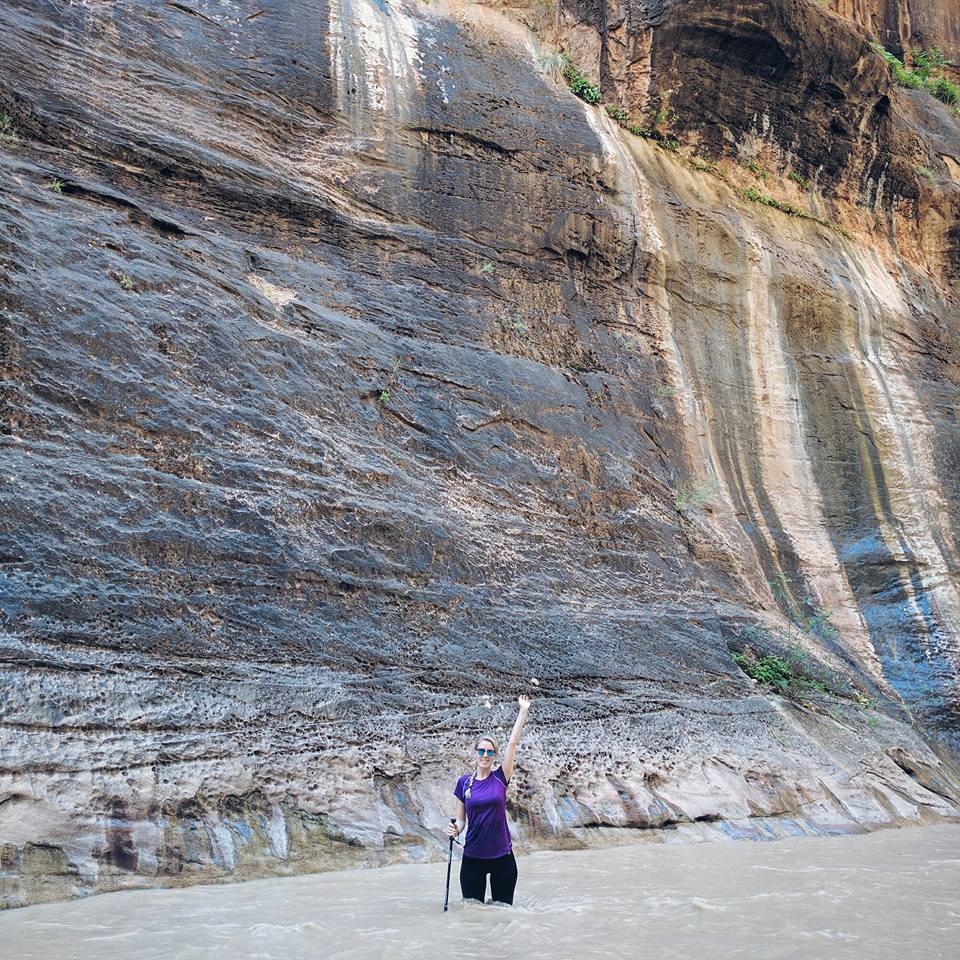
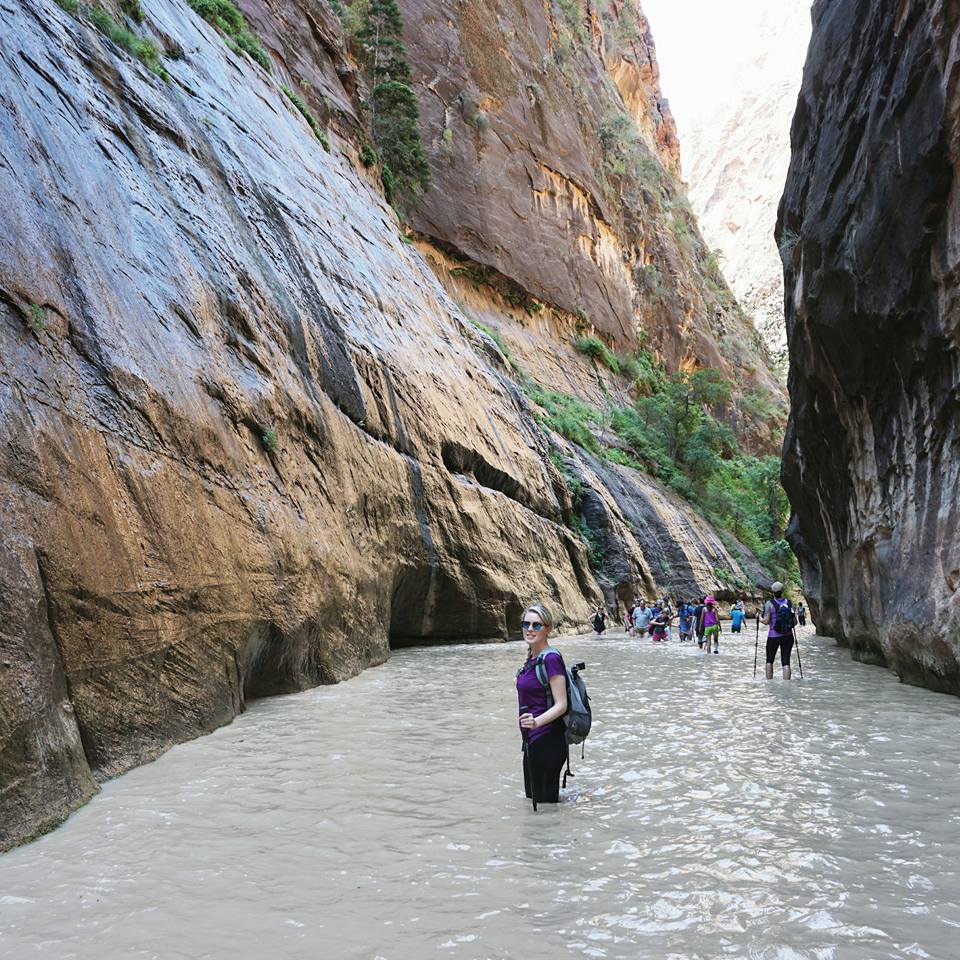
Our first steps into the cold water were a bit of a shock, but we quickly adjusted to its temperatures. Walking upstream was a lot more challenging than walking downstream, which is why our hiking poles were invaluable for this trip.
After a couple of hours into the Bottom Up hike, we decided to turn around and retrace our steps back to the start. If you’re thinking of hiking The Narrows this summer, here are some tips on the best equipment to bring, when to go and what to expect.
Related Posts:
- Zion Nation Park Hikes – Angel’s Landing
- The ultimate 1-week itinerary exploring Utah’s National Parls
Table of Contents
Best way to hike The Narrows
There are a couple of different ways to hike The Narrows:
- Bottom up hike from Temple of Sinawava (day hike) or
- Top down hike from Chamberlain’s Ranch (overnight or day hike)
Both ways require hiking in the Virgin River, so it’s inevitable that you will get your feet wet.
Bottom Up hike from the Temple of Sinawava (no permit required)
This is the most popular hike and perfect for casual hikers and those that want to see the best of the Zion Narrows.
Here you can hike for an hour and return the same way you came, or you can hike as far as Big Spring and back, which is 10-mile round trip.
This Bottom Up hike starts at the Temple of Sinawava, the last stop on the free Zion Canyon shuttle.
Top Down hike from Chamberlain’s Ranch (permit required)
This strenuous 16-mile hike starts at Chamberlain’s Ranch, which you must drive to or hire a private shuttle to take you to this remote trailhead.
This downstream hike can be completed in one or two days and requires a wilderness permit. The one day hike takes around 12-14 hours to complete, so it’s best to get an early start.
Best time to hike The Narrows
The most popular seasons to hike The Narrows are the summer and early autumn. The start of the season is controlled by the water levels and the spring runoff.
It’s still possible to hike The Narrows in the fall and winter, however you won’t be able to get a permit to do the Top-Down one-day hike in the winter. There is simply not enough daylight to complete the hike safely during this time.
The best time of day to hike The Narrows is in the early morning when it’s quiet. The further upstream you hike, the less people you will find. The best light for photography is usually between 10:00am and 3:00pm in the summer season.
Trail difficulty and dangers
The Narrows hike is a moderate to strenuous hike and is dependent on the flow of water. While I wouldn’t recommend this hike to young children, I saw many families with kids. A lot of children actually enjoyed splashing around in the water.
Hiking can be difficult and dangerous when the flow of water is above 100 cfs or when the water is murky, which makes it difficult to see rocks in the water.
The Narrows are susceptible to flash floods and it is not recommended to hike here when the forecast calls for rain. Many tourists may not take the weather seriously, but your safety is important since flash floods have the potential to kill.
Always check the weather forecast and flash flood potential before hiking The Narrows.
Equipment recommendations
For any hike, I always recommend bringing plenty of water, food, a map, and other basic hiking essentials. Below is a list of items that I recommend for hiking The Narrows, which you will find necessary for your trip.
If you don’t have your own equipment, you can rent items from nearby outfitters in Springdale.
Proper footwear
Closed-toed shoes that are water-friendly are a must for hiking The Narrows since you will be walking in knee-deep water for a majority of the time.
I saw many tourists wearing flip-flops or sandals who had to quickly turn around because they underestimated how difficult it was to walk on the slick, uneven rocks. I even saw people walking barefoot, which can be dangerous since it’s easy for your foot to get smashed in the rocks.
For my trip, I wore basic water shoes which worked great, however next time I would wear something with better ankle protection.
It’s an easy place to sprain your ankle if you aren’t being careful with each step. Another shoe that’s great for hiking The Narrows are these quick-drying aqua shoes.
Footwear to avoid: Flip-flops, sandals and cheap water shoes that have the potential to break easily. It’s not safe to have your toes exposed since there are many rocks, sticks and pieces of wood which can be difficult to see in murky water.
I also don’t recommend wearing hiking boots that are not water friendly. These will become too heavy and take a long time to dry.
Dry bag
A dry bag is essential for preventing items such as your wallet, phone or camera from getting wet.
While the water in the Zion Narrows is about knee-deep, there are some areas where the water goes up to your waist or chest. There are some sections of The Narrows that even require swimming.
I saw many people carrying their phones in waterproof cases so they could take photos without worrying about getting it wet. I also saw some people using Ziploc bags to keep their items dry.
Even if you’re only walking in knee-deep water, it’s very easy to trip or miss a step and fall into the water – which I saw happen to a number of hikers. I highly recommend using a dry bag for this reason.
Hiking poles/sticks
I initially thought bringing a hiking pole would get in the way and not be necessary for the Zion Narrows, but I am so happy I brought one.
This invaluable tool is a must for The Narrows and I can’t imagine hiking the river without one!
You don’t need anything fancy and my hiking partner and I shared one set. I used one hand for the hiking pole to keep balanced, and the other hand to hold my camera to take photos.
There were a couple of times when I came close to falling, but fortunately my hiking pole helped me to stay stable. Again, I cannot emphasize the usefulness of bringing a hiking pole for The Narrows.
Proper clothing
Since it’s inevitable that you’ll be hiking in water, I highly recommend wearing clothing that is quick-drying and to avoid cotton.
The water is cool, which feels refreshing in the summer heat, however there is very little direct sunlight in the Zion Narrows. This is why it’s important to wear clothing that is quick drying and appropriate for the trail conditions.
If you’re hiking in the colder months, I recommend wearing fleece or a wetsuit to stay warm.
For my trip, I wore quick-drying capris and a quick-drying shirt which I got on sale at Winners. This worked great for the hike.
GoPro Hero
This is the perfect camera for capturing photos and video of your journey in the Zion Narrows.
It’s smaller than a cellphone and has a waterproof case, which makes it a great sport camera for your outdoor adventure. I found the best price for my GoPro Hero 4 and accessories on Amazon.
Additional recommendations for the Top Down hike
Backpack
You will need a standard overnight backpack for this hike, which includes a sleeping bag, a small tent and a portable stove/cooking supplies. Dry bags are also a must to prevent your items from getting wet.
Headlamp
Navigating the Zion Narrows in the dark without a headlamp is nearly impossible. Having this little piece of equipment is essential if you get stuck in The Narrows after dark, especially if you’re doing the Top-Down day hike.
Neoprene socks
You will find these essential for both the Bottom Up and Top Down hike to help prevent blisters and keeping your feet comfortable.