It was just a few short months ago that I started to take Pinterest more seriously for my blog and learn how to actually use it effectively.
After implementing my new Pinterest strategy three months ago, I have been able to see dramatic results. My Pinterest audience has grown over 1,200%, which has led to increased blog traffic and email subscribers – that’s incredible!
Like seriously, I still can’t believe how quickly my blog has grown just by spending a little more time on Pinterest.
I don’t usually share blogging tips on Mint Notion, and in fact, I was a little hesitant to write this post and reveal all my Pinterest secrets to you.
But lately, almost 80% of my blog traffic has been coming from Pinterest and I feel that you may find these tips helpful.
So if you’re ready to increase your Pinterest audience and grow your blog traffic, here are 12 tips I’ve used for Pinterest!
Table of Contents
1. I verified my website on Pinterest
If you are serious about growing your Pinterest audience, I highly recommend getting a Pinterest for Business account. This will allow you to verify your website URL and get access to analytics about your pins.
Not only will verifying your website make your account look more official, but other Pinterest users will know that you’re the owner of your website and your website is legit.
2. I enabled Rich Pins for my website
Even though I’ve been on Pinterest for a couple of years now, I had no idea what “rich pins” were or how to enable them.
Once I learned how to enable rich pins, I felt pretty silly about how long it took for me to get rich pins from my website.
So you may be wondering, what are “rich pins” and why should you care?
Rich pins are just like regular pins, but better! They include extra information like the headline, your website name and pin description.
When you’re scrolling through Pinterest, the bold headline makes your pin stand out more than regular pins.
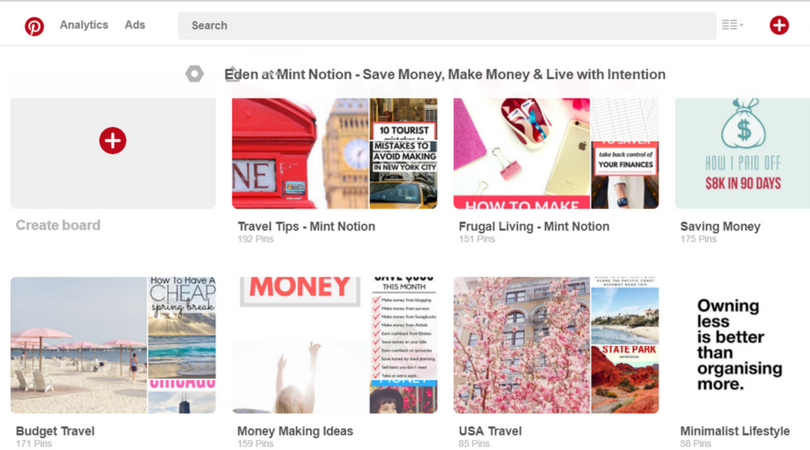
3. I added keywords in my profile bio and board descriptions
I wanted my Pinterest profile to be easy to find, so I made sure to include my name and blog name in my title. (Eden at Mint Notion – Save Money, Make Money, & Live With Intention).
I also made sure to include relevant and specific keywords in my profile bio. You don’t have much room to write here, so make sure to showcase who you are, what you pin about and let your personality shine.
I renamed my board names so they would be easy to find. Pinterest is a search engine, so making sure your boards are SEO-friendly is the key to growing your audience.
It’s tempting to get creative and write unique names for your boards, but instead I recommend using specific and relevant keywords. For example, instead of calling your blog board “My blog posts”, name it after your blog name, such as “Best of Mint Notion”.
4. I created boards specifically for my blog posts
Not everyone is going to follow all of your boards on Pinterest, but they might choose to follow 1 or 2 of your boards.
This is why I recommend creating a board specifically for your blog posts. That way other Pinterest users can choose to follow your board and stay up to date with all your blog content.
5. I arranged my top 5 performing boards at the top
When someone stumbles upon your Pinterest profile, chances are they will quickly skim your bio and your first row of boards. Rarely do they have time to scroll down and check out all of your Pinterest boards. People are busy today and I understand that.
That’s why I recommend putting your top 5 performing boards in the top row — front and center — for everyone to see.
Not sure which boards are your most popular? Check Pinterest analytics to see which ones receive the most engagement.
6. I created a theme for my board covers
Think of your Pinterest profile as a magazine or a beautiful Instagram profile. You want to make sure that each board cover looks uniform and consistent. Pinterest is a visual platform and having a cohesive-looking profile can boost your brand’s power.
There are two ways to do this:
-
Create uniform board cover graphics
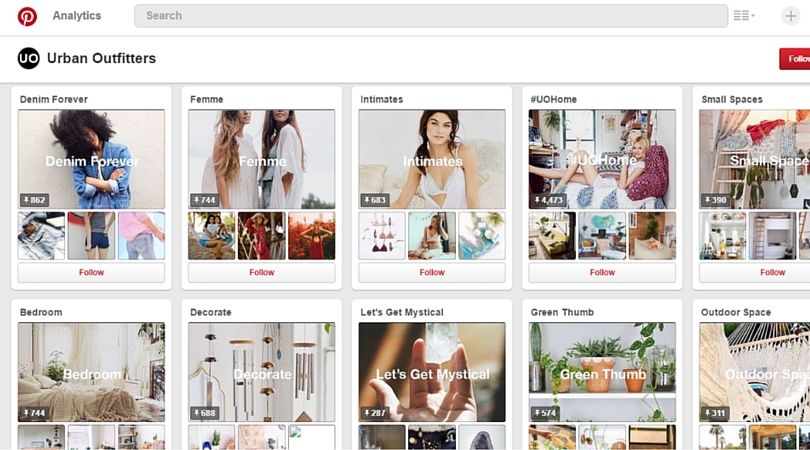
Urban Outfitters created custom board covers which look great. -
Use similar style photos as your board covers
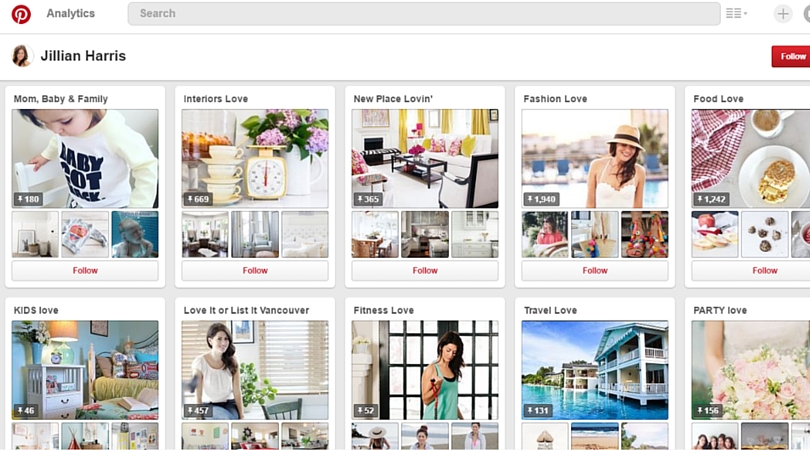
Jillian Harris does a great job of creating similar style photos as her board covers. I prefer this option, however I am still trying to perfect my board covers.
7. I deleted all my under performing pins
I know, I know. You worked so hard on creating pins and pinning interesting content to your boards. However if they are not being repined as often as your other content, this could hurt your pins in the Smart Feed.
Pinterest favors pins and boards that receive a lot of engagement. This means that boards which receive hundreds of re-pins will be deemed more valuable by Pinterest than a board which receives only a handful of re-pins.
If you want your content to reach more people, you will need to focus on only pinning relevant and quality pins.
Once a month, I like to go through my boards and delete pins that are not performing as well as my other top performing pins. For example, if most of my pins are being re-pined 30 times, that means I will delete pins that receive less than 5 re-pins.
This will not only make your profile look cleaner, but it gives your audience a better viewer experience, since they will see your best content.
Update: Before deleting underperforming pins, I edit the pin description and update it with revelant keywords to improve my SEO. Then I test to see if this pin will receive more engagement.
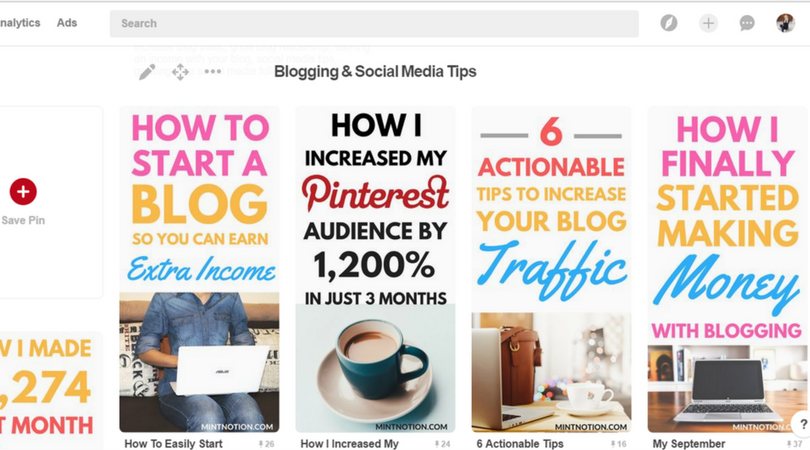
8. I created tall, vertical pins for all my blog posts
Before I started to focus on growing my Pinterest audience, 99% of my pins were horizontal images. Despite this, most of my blog traffic was coming from Pinterest still, and a couple of my horizontal pins were receiving a lot of engagement.
However, once I started to create tall, vertical pins for my blog posts, my Pinterest audience increased dramatically! It was actually crazy. I started focusing on my Pinterest strategy at the beginning of March and my audience grew over 1,200% in just 3 months!
This shows my Pinterest audience growth between March 1st and June 15th.
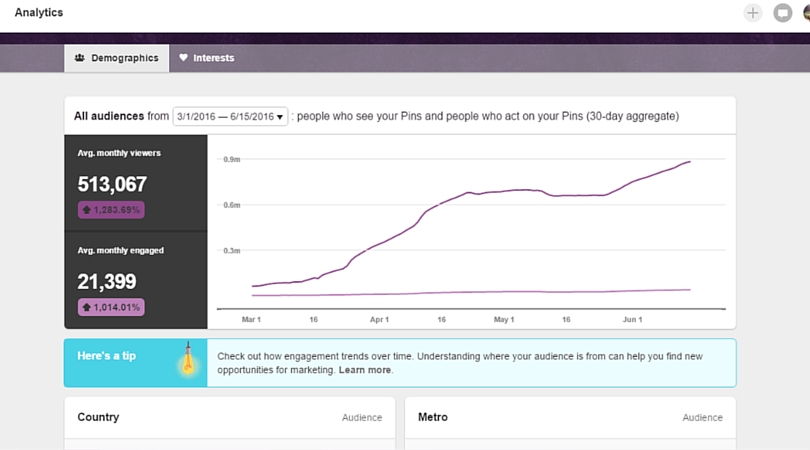
This shows my average monthly viewers on Pinterest.
If you’re not good with Photoshop, I recommend using Canva to create tall, vertical pins. It’s FREE to use and they have a bunch of templates, text, photos and graphics to choose from, which makes it easy to create beautiful pins for your blog or website. Some of their premium options cost a small fee.
Here are some tips for creating pin-worthy pins:
-
Make your pins look consistent with your brand
When creating pins, make sure they look consistent. Once you create enough pins, people will start to recognize your brand, and it will make it easier for them to spot your pins.
When it comes to re-pinning other people’s content, you also want to make sure that these pins look high quality and come from a trust-worthy source.
-
Use warm-colored images and text color
Statistics show that pins featuring warm colors receive more engagement than pins which are more cool toned.
-
Photos are more pinnable than graphics
While graphics are great, photos receive more engagement on Pinterest so make sure to pin lots of great photos.
9. I wrote lengthy, keyword-filled descriptions for all of my pins
Before I started focusing on Pinterest, I used to be really lazy with my pin descriptions. Most of the time my descriptions would just be the title of my post, which doesn’t really give anyone a call to action and make them want to click through to read my blog.
Here are 3 tips I’ve used when creating pin descriptions:
-
Add keywords to make your descriptions SEO-friendly
I make sure to fill my pin description with relevant and specific keywords, without trying to sound too spammy of course.
-
Add relevant hashtags
Pinterest recently starting letting users add hashtags to their pin descriptions. I recommend experimenting with them to see how they impact your engagement.
-
Add a call to action
Always try to add a call to action at the end of your pin description that will encourage the reader to click through to read your blog post. For example, you can add “Click here to find out how to increase your Pinterest audience” or “Click this pin to discover how to increase your Pinterest audience”.
Giving your reader this extra little push is a simple, but effective strategy to get more clicks.
10. I pin consistently
The funny thing about social media is that it works best when you are actually using it and being social. This means that if you want to grow your Pinterest audience, you must pin every day (or almost every day).
I know this sounds like a lot of work, but even just 5-15 minutes of pinning a day can go a long way to help boost your Pinterest audience.
If you are short on time, I recommend using a tool like Tailwind to schedule all of your pins. You can get a free trial of Tailwind through my link!
Here are a few tips for pinning consistently:
-
Pin every day
There is no set rule on how many pins you should pin per day, but I try to pin an average of 50-100 pins per day. I usually pin manually, but you can use Tailwind to schedule your pins.
-
Treat your Pinterest profile as a resource library that’s relevant to your blog
You should aim to pin an even mix of your website’s content and other people’s content. Think of your Pinterest profile as a resource library which shares pins that your target audience would enjoy.
Right now I pin about 80% of my blog’s content and 20% of other people’s content, but I am trying to incorporate more of a 50/50 mix.
-
Create multiple niche-specific boards relevant to your blog
Aim to create lots of niche-specific boards that are relevant to your blog. If you’re a travel blogger for example, instead of having just one board called “Travel”, create multiple boards that are specific to different types of travel. Ideas can include: Budget Travel, Female Solo Travel, Adventure Travel, Places I Want To Visit, etc.
11. I joined active and relevant group Pinterest boards
Hopefully you know by now that you should be pinning your images to multiple boards so you can reach more people in your target audience. However, if you want to get your pins in front of a larger audience, I highly recommend joining group Pinterest boards.
I like using Pingroupie to help me find active and relevant group boards to join. Just follow the instructions in the group’s board description which will tell you how to join.
Sometimes popular groups are no longer accepting new members, but don’t let that discourage you. There are lots of group boards still open to new members and you can even create your own collaborative board!
12. I optimized my blog for Pinterest
To be honest, I don’t like using tall, vertical images on my blog. Since I post a lot of travel photos, I prefer to use landscape photos since I think they look best. On the other hand, food blogs look great when they use tall, vertical images.
Fortunately if you’re like me and you don’t want to use tall, vertical images on your blog, you can insert a hidden image in your post instead. This will not be shown in your blog post, but if someone pins your post to Pinterest, they can pin your hidden tall, vertical image (made specifically for Pinterest).
Use this code to create a hidden image in your post:

I admit that I haven’t done this step for all of my blog posts yet, but I am working on it. Yes, I know all this blog promotion stuff takes time!
Another way I optimized my blog for Pinterest is I made sure to include that snazzy hover “Pin it” button on my blog images. People are busy and you want to make it SUPER EASY for them to pin your stuff.
Update: I now use the Social Pug plugin, which allows me to add the image that I want to be shared on Pinterest without using extra codes. It’s super easy to use and comes with a ton of other great features like “Click to Tweet” and custom social sharing buttons.
Over to you – what tips have worked for you on Pinterest? Is there something I missed on this list?
If you enjoyed this post please share it with your friends and leave me a comment so I can share more blogging tips on Mint Notion in the future!
If you’re interested in starting your own blog, I created a free 7-day email course to help you start a blog and learn how to make it successful. You can join below!
PS: Are we friends on Pinterest yet?
Great work here Eden! I’ve used many of the same tactics you’ve mentioned above with great success as well. After about a year of optimized effort and creating Pinterest optimized blog post images, my Pinterest traffic increased by 2,000% and Pinterest is now (2 years later) responsible for about 50% of my social media traffic!
Always great to see someone using Social Warfare as well– thanks for the shoutout! 😀
Thanks Dustin! I agree that Pinterest is such an important platform for boosting blog traffic.
I have been so happy with the Social Warfare plugin, it’s an incredible tool and I can’t imagine having a blog without it! Also, I am a big fan of your blog, your post about creating a stunning reader experience has given me a lot of insight into my own work. 🙂